My Pironman is ready for the next stage of study, using the NPU of the Hailo M.2 card to put the AI spin on some pictures. A couple days ago I ordered the special ribbon cable (Raspberry Pi Camera Cable Standard-Mini 500mm) to connect camera to motherboard. When I was assembling the case last month there were a couple of [optional] steps in the instructions for installing the camera. The [optional] step in step 10 shows the camera FPC ribbon cable installation and the [optional] step in step 18 shows the mounting of the camera on the other end of the ribbon cable. I have included a picture of my Pironman interior with NVMe PIP and Power Switch Converter removed. I have about an inch of the FPC cable inserted, right up next to a M2.5 X 18 + 4 standoff.
The Power Switch Converter board (not in the picture) will be right in the way of a proper FPC cable path. It is attached to the NVMe PIP in the middle (also not in the picture) and to two of those standoffs at either end. I can’t negotiate the turns around the standoff followed by the near 90 degree rotation to the motherboard camera socket. FPC ribbon cable is delicate and has a minimum bend radius and restrictions on flexing that I don’t think will work in this installation. Is there a solution for this?
Maybe extend the motherboard camera FPC slots out to the USB HDMI Adapter board.
The current method is to gently bend the camera cable to pass around the copper pillar.
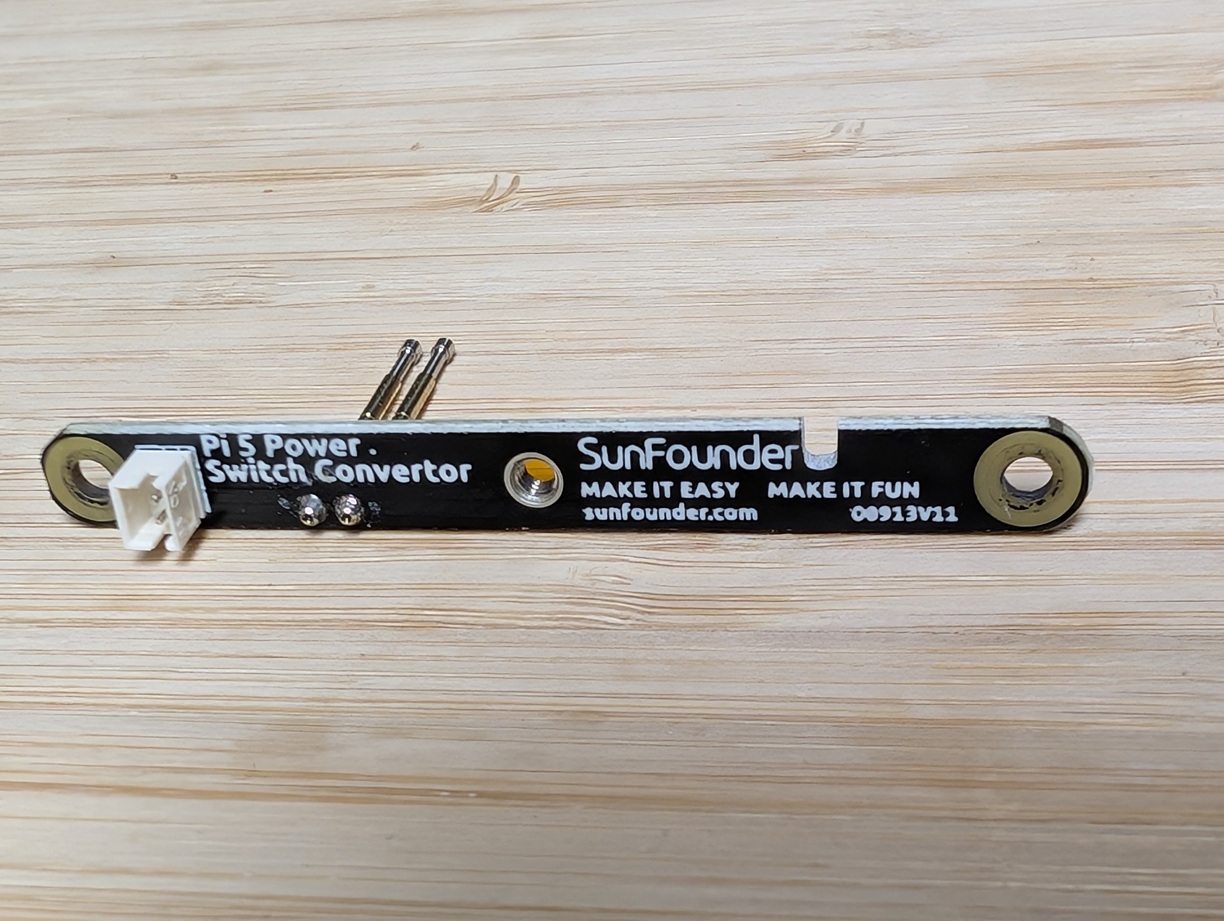
I am happy to report that I resolved the problem with the camera cable. It required some modifications which I have photo documented and will include in this discussion. I did not have to purchase another special FPC camera ribbon cable, which would have certainly broken if I persisted in trying to get it to fit. All I had to do was put a notch in the Pi 5 Power Switch Converter board to allow a more or less vertical approach of the ribbon cable to the motherboard camera socket.
This is the modified Pi 5 Power Switch Converter board:
The incision was made in the part of the board without any circuits.
The finished product shows the ribbon cable securely fastened with a slight turn visible. I didn’t want to cut more than half of the board for structural reasons. Not much tension on that area anyway:
I have tested it with some of the tutorial demo scripts and it works great. Can’t wait to try some of the Hailo demos in the GitHub repository.
I will end with a quick question. When the script is running in the CLI, it looks like a video of the object identification is being recorded. I was going to poke around in the file structure to see if I could find where they are being saved. Seems like there was a note in the CLI log though, saying that a permission was required to create a log file. I’ll figure that out too in the coming days.
2 Likes